

Description
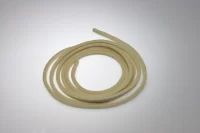
Autoharp Replacement Felt-Black
Replacement Autoharp Felt 3/16” x 7/32” for 21 and 15 bar Autoharps.
Ideal for Oscar Schmidt, Ashbury, Ozark etc.
Sold in bar lengths average 26.5cm
Felt Changing Tips
Tools for Changing Felt Tips:
• Felt
• Screw Driver
• Pencil/Marker
• Razer Blade or Stanley Knife
Steps:
• Remove the bar cover from your autoharp by removing the screws.
• Take a picture of the arrangement of the bars for your autoharp so you know
how to put them back together OR as you take the bars out of the autoharp
lay them out in order out of the way.
• Once the bars are taken off, use the marker or pencil to mark on the bar itself
where the cuts in the felt are.
• Turn the bar so that the felt is facing upward, using the knife strip away the
felt from the metal of the bar.
• It is important to note that the bars do not have to be residue free but they
must be level, so you only have to strip off enough of the left behind residue
for the bar to be level.
• Now you are ready to apply the new felt. For this it is best to run the felt
between your finger and your thumb and pinch the bar with the same two
fingers so that the felt does not run off the edge of the bar and bump into
other bars.
For your Oscar Schmidt Ashbury and Ozark bars it is important to let the felt hang off the ends of the bar
about ⅛ of an inch. This will keep the bar from moving side to side while you are
playing it.
• Now to get the air bubbles out, use the edge of a table and a little pressure to
squeeze out all the air bubbles in the felt. Drag the felt side of the bar across the
edge of the table two or three times. This may rough up the surface of the felt but
that is okay, it will help with the breaking in process.
• Place the bar you are working with back in the correct place in the autoharp and
mark the location of the cord on the felt itself. These should line up with the pencil or
marker marks from earlier but this is just to double check.
• Once once it is checked, cut a “V” notch in the felt approximately 1/16 inch at the top
on each side of the mark and the bottom of the V needs to be exactly where the
mark is.
• Be sure to keep the knife perpendicular to the bar itself to ensure that the mark is in
the correct place.
• Now put all the bars back on your autoharp and test them.
• After they are tested reassemble the bar cover on your autoharp and you are ready
to play with fresh felt.





Graham Hood –
Worked perfectly. Thank you Graham
Bill Mason –
Good quality product and fast delivery. Bill Mason
Neil Baxter –
Excellent quality and fast delivery. Neil Baxter
Chris Franks –
Perfect item. Chris Franks
Yvonne –
Excellent replacement. Yvonne